Remnant 2 Builds: Top “Set It and Forget It” Options 2025
Remnant 2 offers several powerful “set it and forget it” builds that minimize micromanagement while maximizing damage output, with options like the Gunslinger/Hunter combo for infinite ammo or the Invoker/Ritualist for lifesteal AOE farming.
The Concept of “Set It and Forget It” Builds in Remnant 2
In Remnant 2, players often search for builds that deliver consistent performance without requiring constant attention to mechanics or complex combinations. These “set it and forget it” builds focus on passive abilities, automatic effects, and straightforward playstyles that allow players to focus on enjoying the game rather than managing intricate systems.
Such builds are particularly valuable for newer players still learning the game’s mechanics, players who prefer a more relaxed gaming experience, or those tackling difficult content like Apocalypse difficulty where simplicity can be an advantage.
Why These Builds Are Popular
The appeal of low-maintenance builds lies in their accessibility and reliability. They typically feature:
- Passive damage or healing effects that work automatically
- High survivability through damage reduction or health regeneration
- Simplified combat patterns that don’t require precise timing
- Reduced reliance on consumables or resource management
- Effectiveness across various content types without needing to swap gear
These builds allow players to concentrate on positioning, dodging, and target prioritization rather than juggling complex ability rotations or monitoring multiple buffs and debuffs.
Top “Set It and Forget It” Builds
The Unlimited Ammo Gunslinger
This build centers around the Gunslinger archetype and its Quickdraw ability, paired with weapons that have large magazine sizes like the Bonesaw. The combination creates a setup where you rarely need to worry about ammunition or reloading.
Core Components:
- Primary Archetype: Gunslinger
- Key Skill: Quickdraw (instantly reloads weapons and refreshes ammo)
- Essential Trait: Expertise (reduces skill cooldown by up to 20%)
- Recommended Weapon: Bonesaw (high magazine capacity)
The beauty of this build lies in its simplicity. By using Quickdraw whenever it’s available, you maintain nearly infinite ammunition, eliminating the need to search for ammo boxes or conserve shots. This allows you to focus entirely on combat positioning and target selection.
For maximum effectiveness, pair the Gunslinger with Hunter as your secondary archetype to boost overall damage output. The combination provides excellent sustained damage without requiring complex setups or precise execution.
The Regenerator Tank Build
For players who prioritize survivability above all else, the Regenerator build offers incredible damage reduction and health regeneration capabilities that make it nearly immortal in most combat situations.
Core Components:
- Archetypes: Medic and Summoner
- Key Equipment: Crystal Heart Relic, Red Doe Sigil Amulet
- Armor: Any set that provides good damage reduction
- Relic Fragments: Health, Damage Reduction, Healing Effectiveness
This build achieves up to 79.9% damage reduction when using a Relic, allowing you to tank most boss attacks in the game. The Red Doe Sigil increases Relic healing effectiveness by 30%, doubling when below 50% health, creating a powerful healing loop.
The Summoner archetype adds Flyers that draw enemy attention while providing additional damage. This combination creates a highly forgiving experience, especially valuable for players tackling Apocalypse difficulty or learning boss mechanics.
The Invoker/Ritualist Lifesteal AOE Farmer
This build focuses on area-of-effect (AOE) damage through mods and skills while providing substantial lifesteal to maintain health during intense combat.
Core Components:
- Archetypes: Invoker and Ritualist
- Key Feature: Deathwish (increases all damage by 50% and provides lifesteal)
- Playstyle: Focus on Mod and Skill AOE damage
The build excels at farming experience points and handling groups of enemies efficiently. It’s effective even at Invoker level 1 since it utilizes the first skill the archetype receives. The combination of AOE damage and lifesteal creates a self-sustaining combat loop where you damage multiple enemies simultaneously while healing from the damage dealt.
This setup is particularly effective for players who enjoy a more aggressive playstyle but still want the security of consistent health recovery without needing to rely on consumables or defensive positioning.
The Die Hard Conservator
This build combines the Challenger’s resilience with the Alchemist’s area buffs to create a functionally immortal character at melee range.
Core Components:
- Archetypes: Challenger and Alchemist
- Key Skills: Juggernaut and Vial: Elixir of Life
- Recommended Weapons: Vice Grips, Atom Smasher
- Essential Rings: Lucky Cat, Rally Band, Thalos Eyelet, Brawler’s Pride
The Die Hard Conservator excels at close-range combat, using Juggernaut to increase melee damage and become an unstoppable force. The Vial: Elixir of Life creates a healing circle where you cannot take lethal damage, and if that buff expires, the Die Hard primary perk activates, granting immunity to lethal damage.
With the Lucky Cat ring adding a third chance to avoid lethal damage, this build offers multiple layers of protection against death. The Rally Band and Thalos Eyelet help manage gray health and consistently recover HP during combat, while Brawler’s Pride boosts melee speed.
This build is ideal for players who enjoy aggressive melee combat but want the security of multiple fail-safes against death. Its main limitations are slower movement speed and reduced effectiveness at range.
The Genesis Bow Build
For players who prefer ranged combat with consistent critical hits, the Genesis Bow build offers a straightforward yet highly effective approach.
Core Components:
- Archetypes: Hunter and Gunslinger
- Key Weapon: The Genesis bow with Supercharger
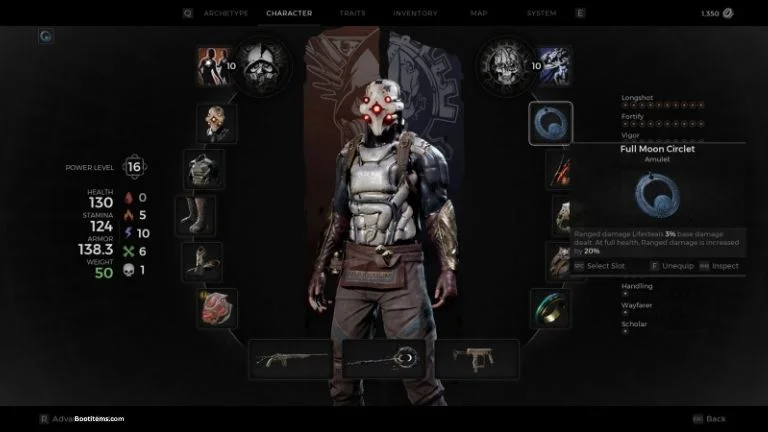
- Essential Amulet: Zero Hour
- Required Rings: Akari War Band, Probability Cord, Archer’s Crest, Braided Thorns
- Armor: Lightweight setup (under 40 total weight)
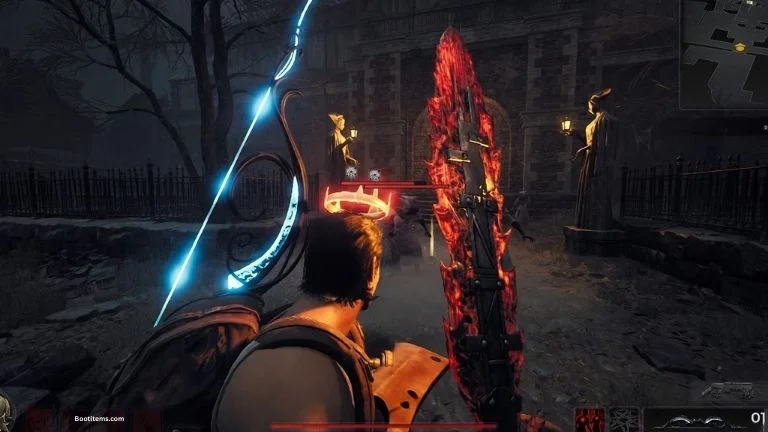
This build achieves an impressive 90% critical hit chance, ensuring nearly every shot is a critical hit. The key is maintaining lightweight status (under 40 weight) to maximize the benefits of the Zero Hour amulet. The Strong Back trait helps achieve this while still wearing decent armor.
The Genesis bow with the Supercharger mod increases weak spot damage and adds 10% critical chance. When combined with the other equipment, this creates a devastating ranged setup that delivers consistent high damage without requiring complex rotations or resource management.

Specialized “Set It and Forget It” Builds
The Passive Heal Generation Medic
This build focuses on creating constant healing for both yourself and teammates without requiring active management once set up.
Core Components:
- Relic: Tranquil Heart (provides passive health regeneration)
- Amulet: Nimue’s Ribbon (shares healing with teammates)
- Rings: Burden of the Divine, Dense Silicon Ring, Ring of Grace
- Armor: Elder Set (lightweight with good resistances)
Once established with the core items (Tranquil Heart and Nimue’s Ribbon), this build provides substantial passive healing that keeps both you and your team alive with minimal active management. The combination creates “ridiculous passive regeneration” that only requires intervention during periods of extreme damage.
The Burden of the Divine ring is particularly valuable as it reduces your damage (lowering threat generation) while allowing you to heal allies with any healing you apply to yourself. The Dense Silicon Ring converts received healing into mod power, creating a virtuous cycle of healing and ability usage.
The Bleed Build
Status effect builds shine in Remnant 2, with Bleed being particularly effective for a hands-off approach to damage dealing.
Core Components:
- Focus: Inflicting and maximizing Bleed status effects
- Playstyle: Cause Bleed on enemies and let the status effect do most of the damage
This build allows you to apply Bleed status effects to enemies and then hang back while the damage-over-time effect does most of the work. You can finish enemies off with occasional well-placed shots without needing to maintain constant offensive pressure.
The Bleed build is ideal for players who prefer a more methodical approach to combat, allowing you to focus on positioning and survival while your status effects handle the damage output. It’s particularly effective against tougher enemies with large health pools, as the percentage-based damage from Bleed scales well against them.
Building for Different Playstyles
For Solo Players
Solo players benefit most from self-sufficient builds that don’t rely on team synergies. The Regenerator Tank or Die Hard Conservator builds are excellent choices, as they provide multiple layers of protection against death while still delivering reasonable damage output.
Key considerations for solo “set it and forget it” builds:
- Prioritize self-healing and damage reduction
- Include crowd control options to manage multiple enemies
- Balance offense and defense since you won’t have teammates to compensate for weaknesses
For Co-op Players
In cooperative play, specialized roles become more viable. The Passive Heal Generation Medic shines in team settings, providing constant healing to the entire group without requiring active management beyond the initial setup.
Effective co-op builds often focus on:
- Area buffs that benefit the entire team
- Passive healing or protection for teammates
- Crowd control to protect less tanky teammates
- Status effects that multiple players can capitalize on
For Apocalypse Difficulty
The highest difficulty in Remnant 2 demands builds with exceptional survivability. The Regenerator build was specifically designed to help players tackle Apocalypse difficulty by providing near-maximum damage reduction (79.9%) and substantial healing capabilities.
For Apocalypse difficulty, effective “set it and forget it” builds typically include:
- Multiple layers of damage mitigation
- Reliable self-healing that doesn’t require precise timing
- Consistent damage output that doesn’t rely on perfect execution
- Mobility options to avoid one-shot mechanics
Essential Equipment for Low-Maintenance Builds
Weapons
Several weapons work particularly well in low-maintenance builds:
- Merciless: Automatic rifle with high raw damage and easy Bleed application
- Bonesaw: Large magazine capacity that pairs well with Gunslinger’s Quickdraw
- The Genesis: Bow that achieves extremely high critical hit chance with the right setup
- Vice Grips: Fast melee weapon that works well with tank builds
Amulets
Key amulets for “set it and forget it” builds include:
- Red Doe Sigil: Increases Relic healing effectiveness by 30%, doubling when below 50% health
- Nimue’s Ribbon: Shares healing with teammates for passive team support
- Zero Hour: Essential for lightweight critical hit builds
Rings
Several rings provide powerful passive effects:
- Burden of the Divine: Reduces damage but allows healing allies with self-healing
- Dense Silicon Ring: Converts received healing to mod power
- Lucky Cat: Provides a chance to avoid lethal damage
- Ring of Grace: Improves survivability and mod generation
Relics
The most valuable relics for low-maintenance builds are:
- Tranquil Heart: Provides constant health regeneration
- Crystal Heart: Offers substantial damage reduction
- Bloodless Heart: When combined with certain items, can be used infinitely
Traits to Prioritize
Certain traits significantly enhance the effectiveness of “set it and forget it” builds:
- Expertise: Reduces skill cooldown by up to 20%
- Strong Back: Increases weight limit, allowing for better armor while maintaining lightweight status
- Life Siphoner: Improves lifesteal effects
- Fitness: Increases maximum health
- Handling: Improves weapon handling for more consistent performance
Frequently Asked Questions
Are “set it and forget it” builds viable in endgame content?
Yes, many of these builds are specifically designed for Apocalypse difficulty, the game’s highest challenge level. The Regenerator build, for example, was created to help players tackle Apocalypse content by providing near-maximum damage reduction and substantial healing.
Which build is best for complete beginners?
The Regenerator build is explicitly described as “beginner-friendly” as it allows for plenty of mistakes in combat while still performing well. Its focus on damage reduction and health regeneration creates a forgiving experience that helps new players learn the game’s mechanics.
Do these builds require DLC content?
Some builds utilize equipment from DLC content like The Forgotten Kingdom or The Awakened King. However, many core concepts can be adapted using base game equipment. The Unlimited Ammo Gunslinger, for example, primarily uses base game components.
How do I transition from a beginner build to more advanced setups?
Start with a forgiving build like The Regenerator to learn boss patterns and game mechanics. As you become more comfortable, gradually incorporate elements from more damage-focused builds while maintaining some defensive capabilities. Eventually, you can shift to specialized builds once you’re confident in your ability to avoid damage through positioning and timing.
Can I modify these builds to suit my playstyle?
Absolutely. These builds provide frameworks that can be adjusted based on personal preference and available equipment. For example, many builds note that weapon choices are flexible, allowing you to use your preferred weapons while maintaining the core functionality of the build.

Samantha Yates is a creative writer and journalist with expertise in content creation and editing. She holds an MA in Creative Writing and brings professional experience from Lionbridge, where she developed engaging content for leading technology companies


