Complete Database Part 2 in Tarkov: OLI Document Guide
Database Part 2 in Escape from Tarkov requires players to find OLI cargo route documents on Interchange, which requires the OLI logistics department office key, and then deliver them to Ragman.
What is Database Part 2 in Escape from Tarkov?
Database Part 2 is a quest given by Ragman in Escape from Tarkov that follows the completion of the first Database task. This quest requires players to venture into the Interchange map to locate and secure cargo route documents from the OLI store.
Unlike the first part of the Database quest series, this task requires a specific key to access the room where the documents are stored. The quest is relatively straightforward but can be challenging due to the high player traffic in the OLI area of Interchange.
The quest has two main objectives:
- Locate and secure the OLI cargo route documents on Interchange
- Hand over the documents to Ragman
This quest is part of the progression path in Escape from Tarkov and is required for obtaining the Kappa container, making it an important task for players aiming to complete all quests in the game.
Requirements for Database Part 2
OLI Logistics Department Office Key
The most important requirement for completing Database Part 2 is the OLI logistics department office key. Without this key, you won’t be able to access the room where the cargo route documents are located. There are several ways to obtain this key:
- Purchase it from the Flea Market – This is often the easiest method, though the price can vary significantly. Early in a wipe cycle, the key can cost upwards of 150,000 rubles, but the price typically settles around 80,000 rubles as the wipe progresses.
- Barter trade with Jaeger – At Loyalty Level 3, Jaeger offers a barter trade for the key. You’ll need to exchange four hunting matches, two Zibbo lighters, and one dry fuel to obtain the key.
- Find it in-raid – The key can spawn in various locations:
- In the pockets and bags of AI Scavs
- In jackets throughout Tarkov
- In drawers
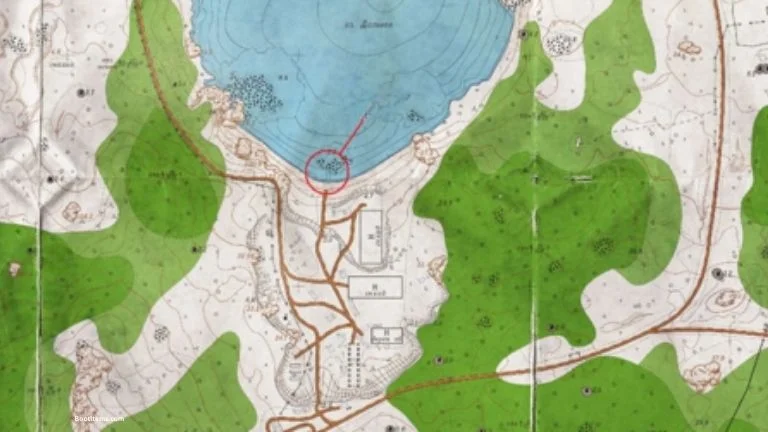
- There’s also a specific spawn location on Customs: in the trunk of a blue car near the shortcut between new gas station and the power building
Having this key in your secure container is recommended to prevent losing it if you die during the raid.
Other Preparation Tips
Before heading into Interchange for this quest, consider the following preparation steps:
- Bring appropriate gear for PvP encounters, as the OLI area can be highly contested
- Consider bringing a headset to better hear approaching enemies
- Plan your route to the OLI store and your extraction point
- If possible, coordinate with teammates to increase your chances of survival
Locating the OLI Cargo Route Documents
Navigating to OLI Store
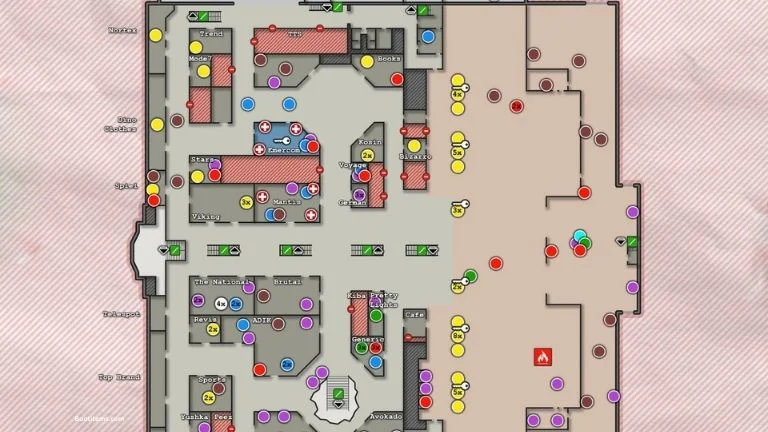
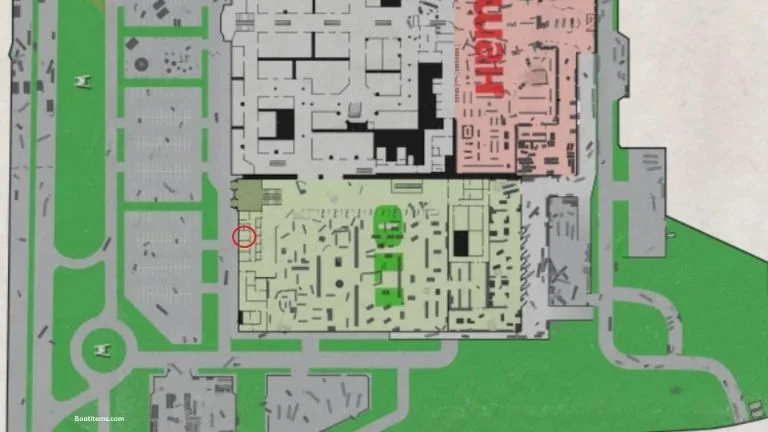
The OLI store is located on the southern part of the Interchange mall. It’s the large green-themed store that occupies a significant portion of the ground floor. There are multiple entrances to OLI, but for the purpose of this quest, you’ll want to enter through the front entrance of the store.
When you enter OLI from the main entrance (the front of the store), you’ll need to navigate to the office area. This area is located on the far right side of the store when entering from the front.
Finding the Office Area
Once you’re inside OLI, head to the far right side of the store. Look for an entryway that’s tucked away just to the left of the entrance stairs. This leads to the office area of OLI. The office area consists of a hallway with several rooms.
After entering this door, take a left and continue down the hallway until you reach a door on your right. This is the door that requires the OLI logistics department office key.
Accessing the Documents
Use the OLI logistics department office key to unlock the door. Once inside the room, look to your left. You’ll see a wooden shelf with multiple compartments. The cargo route documents are located on the middle compartment of this shelf, attached to a board.
To pick up the documents, stand close to them and use your interact key (default is “F”). After picking up the documents, they will be added to your inventory.
Extracting and Completing the Quest
Surviving and Extracting
After securing the cargo route documents, your next objective is to successfully extract from the raid. If you die before extracting, you’ll lose the documents and will need to repeat the process in another raid.
Choose your extraction point carefully based on your spawn location and the current situation in the raid. Some common extraction points on Interchange include:
- Emercom Checkpoint
- Railway Exfil
- Power Station
- Saferoom Exfil (requires power activation and payment)
Be cautious when moving toward your extraction point, as other players may be camping these areas.
Turning in the Documents to Ragman
Once you’ve successfully extracted with the cargo route documents, you need to turn them in to Ragman to complete the quest. To do this:
- Go to the Traders tab in your game menu
- Select Ragman
- Navigate to the Tasks tab
- Find Database Part 2 and click on the “Hand over” button
- Confirm the action to complete the quest

Rewards for Completing Database Part 2
Upon completing Database Part 2, you’ll receive several rewards:
Experience and Reputation
- 8,500 Experience points
- +0.03 Ragman reputation
Increasing your reputation with Ragman helps unlock higher loyalty levels, which in turn provides access to better items and trades.
Item Rewards
- 1x Car battery
- 1x Phase control relay
These items can be used for other quests, hideout upgrades, or sold for profit.
Unlocks
Completing Database Part 2 also unlocks:
- The 6B3TM-01 armored rig on Ragman at Loyalty Level 2
- Access to follow-up quests: “Sew it Good – Part 1,” “Minibus,” and “Gratitude”
These follow-up quests are part of the progression path in Escape from Tarkov and may be required for obtaining the Kappa container.
Troubleshooting Common Issues
Quest Not Completing Properly
Some players have reported issues with the quest not completing properly or not receiving rewards after extraction. If you encounter this issue:
- Restart your game – Sometimes a simple restart can resolve quest-related issues
- Check if the quest appears in your completed quests list – If it does, you may have already received the rewards
- Contact support if the issue persists
Unable to Find the Documents
If you’re having trouble finding the cargo route documents:
- Double-check that you’re in the correct room – Make sure you’ve used the OLI logistics department office key on the right door
- Look carefully at the shelf on the left side of the room – The documents are attached to a board on the middle compartment
- Ensure you’re standing close enough to interact with the documents
Dying Before Extraction
If you’re consistently dying before being able to extract with the documents:
- Consider changing your approach time – Try going for the documents early or late in the raid when there might be fewer players
- Take a different route through the mall – Avoid high-traffic areas when possible
- Team up with other players to increase your chances of survival
Tips for Successful Completion
Timing Your Raid
The timing of your raid can significantly impact your chances of successfully completing Database Part 2:
- Early raid – Going for the documents immediately after spawning can be effective, but you may encounter other players with the same objective
- Mid raid – The mall might be less crowded, but be aware of players who have moved inside from their spawn locations
- Late raid – The risk of encountering other players decreases, but you’ll have less time to find and extract with the documents
Alternative Routes
Consider taking alternative routes to reach the OLI store:
- Enter through the back of OLI – This can be less crowded than the main entrance
- Use the underground parking garage – This provides cover and can be a safer approach
- Enter through a different store and make your way to OLI – This can help avoid players who are specifically targeting OLI
Dealing with Other Players
Interchange is known for its PvP encounters, so be prepared to deal with other players:
- Listen carefully for footsteps and other sounds that might indicate nearby players
- Consider using a suppressor to remain less detectable
- Be prepared to engage or avoid combat depending on your gear and skill level
- Use cover effectively when moving through the mall
Importance of Database Part 2 in Progression
Database Part 2 is an important quest in the overall progression of Escape from Tarkov for several reasons:
- It’s required for obtaining the Kappa container, which is the ultimate secure container in the game
- It unlocks follow-up quests that provide valuable rewards and further progression
- It increases your reputation with Ragman, helping you reach higher loyalty levels
Completing this quest efficiently can help accelerate your progress in the game and provide access to better equipment and trades.
Classified Technologies Tarkov
Frequently Asked Questions
Where is the OLI logistics department office key located?
The OLI logistics department office key can be found in several locations: in the pockets and bags of AI Scavs, in jackets throughout Tarkov, in drawers, and there’s a specific spawn in the trunk of a blue car near the shortcut between new gas station and the power building on Customs. It can also be obtained through a barter trade with Jaeger at Loyalty Level 3 or purchased from the Flea Market.
Can I complete Database Part 2 as a Scav?
No, you cannot complete Database Part 2 as a Scav. Quest progress can only be made when playing as your PMC character. Additionally, you would need to bring the OLI logistics department office key with you, which isn’t possible when spawning as a Scav unless you find it during that raid.
What happens if I die after picking up the documents?
If you die after picking up the cargo route documents but before extracting, you will lose the documents and will need to go back to Interchange in another raid to retrieve them again. The quest will not be completed until you successfully extract with the documents and turn them in to Ragman.
Is Database Part 2 required for Kappa container?
Yes, Database Part 2 is required for obtaining the Kappa container. It’s part of the questline that must be completed to qualify for the Collector quest, which rewards the Kappa container.
What quests are unlocked after completing Database Part 2?
After completing Database Part 2, you’ll unlock several follow-up quests: “Sew it Good – Part 1,” “Minibus,” and “Gratitude.” These quests continue your progression with Ragman and provide additional rewards and reputation.
Mechanic’s Quest in Escape from Tarkov

Samantha Yates is a creative writer and journalist with expertise in content creation and editing. She holds an MA in Creative Writing and brings professional experience from Lionbridge, where she developed engaging content for leading technology companies


